Introduction
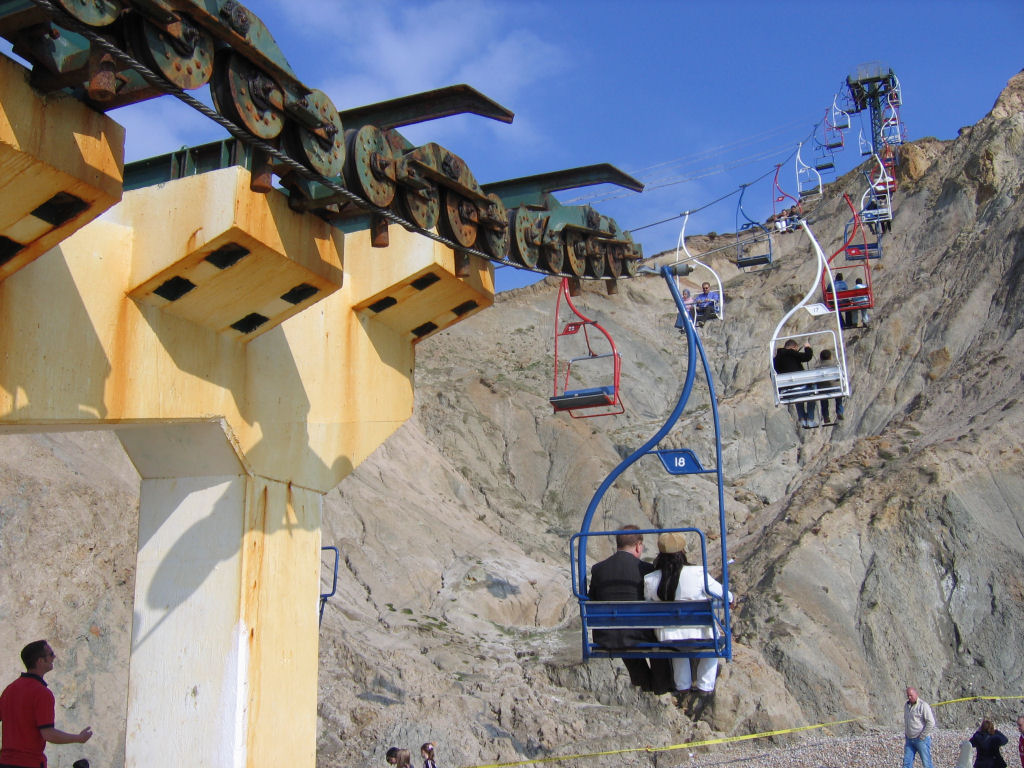
Alum Bay is located on the most western tip of the Isle of Wight and is an area of outstanding natural beauty, famous for its coloured sands and the chalk Needles and lighthouse. Many people flock from the mainland to view the scenery and visit the Needles Park during their stay. The Solent ferry crossing takes around an hour (depending where you depart from) and then there’s a 30 minute drive from Cowes to Alum Bay.
The Needles Park is a popular family attraction with tourists and provides a variety of sand based activities, including glass making, small rides and souvenir shops. You can easily spend a couple of hours within the park before heading to the beach, although for many reading this page, it’s more likely the other way around!
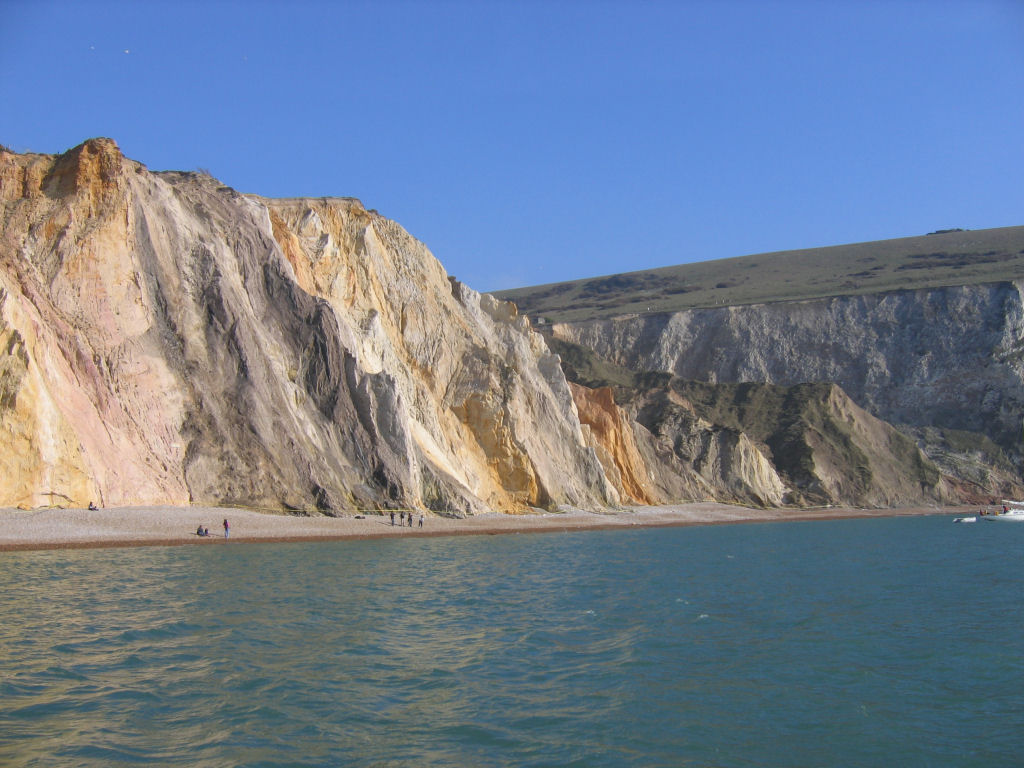
From the Needles Park there are a three routes to the beach; many people choose the chair-lift, as this saves descending the steps or dirt track. Alternatively, steps lead down to the beach from within the Needles Park, towards the seaward end (clearly indicated within the park).
Although fossils are not the main attraction, the combination of fascinating geology and stunning views, make this a worthy destination for individuals and families. It’s worth spending a few hours at Alum Bay and experiencing the chartered boat trip to view the Needles and lighthouse.
The geology of Alum Bay
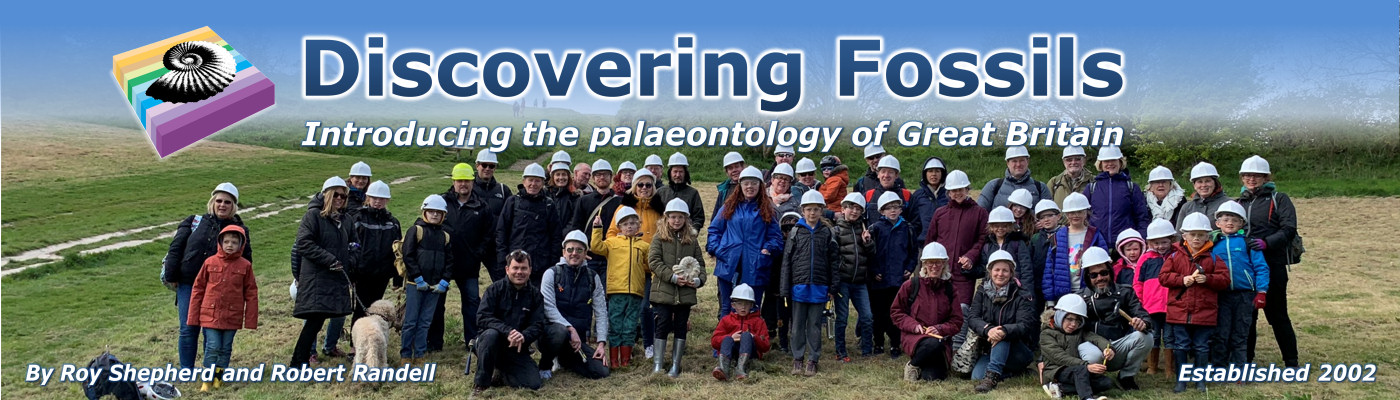
The geology of Alum Bay tells a story of significant biological and physical change, spanning 50 million years. The northern and middle sections of the bay are comprised of sediments deposited in a shallow, warm sea between 54-35 mya (Palaeogene period / Eocene epoch); the southern end comprises towering chalk cliffs, deposited in deeper water around 80 mya.
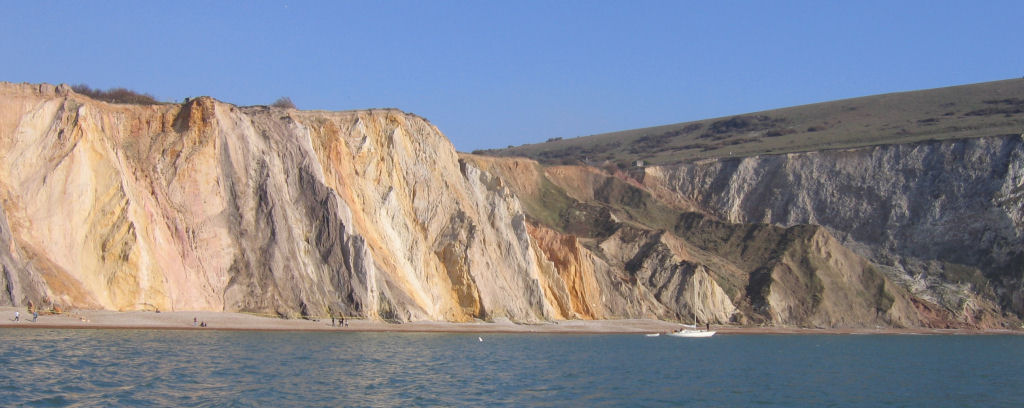
Alum Bay is well known for its colourful sands, which are often sold in glass vessels within the Needles Park and surrounding tourist shops, and also in other parts of the country too. The sands are largely derived from the Bracklesham Group, located along the middle sections of the bay. Although the sediments were originally lying horizontally, the pressure of continental movement over millions of years has resulted in localised folding, which is now evident by the vertical position of the beds.

As you head south along the beach the sediments become progressively older and consequently the fossils you find differ depending where you search. The only consistent geology occurs in the form of flint pebbles which line the foreshore, which originate from Cretaceous chalk (see Seven Sisters for evidence of flint depositing).
Where to look for fossils?
From the beach access point, when facing out to sea, fossils can be found in both directions – south (left) and north (right). For much of the year access to the cliff base is restricted in order to protect the faces from irresponsible hammering/digging. Please observe these restrictions and remember that this is a fragile, beautiful stretch of coast enjoyed by many. Alum Bay is the only place in the country where such a range of sand colours can be viewed in the cliffs (collecting sand is prohibited).
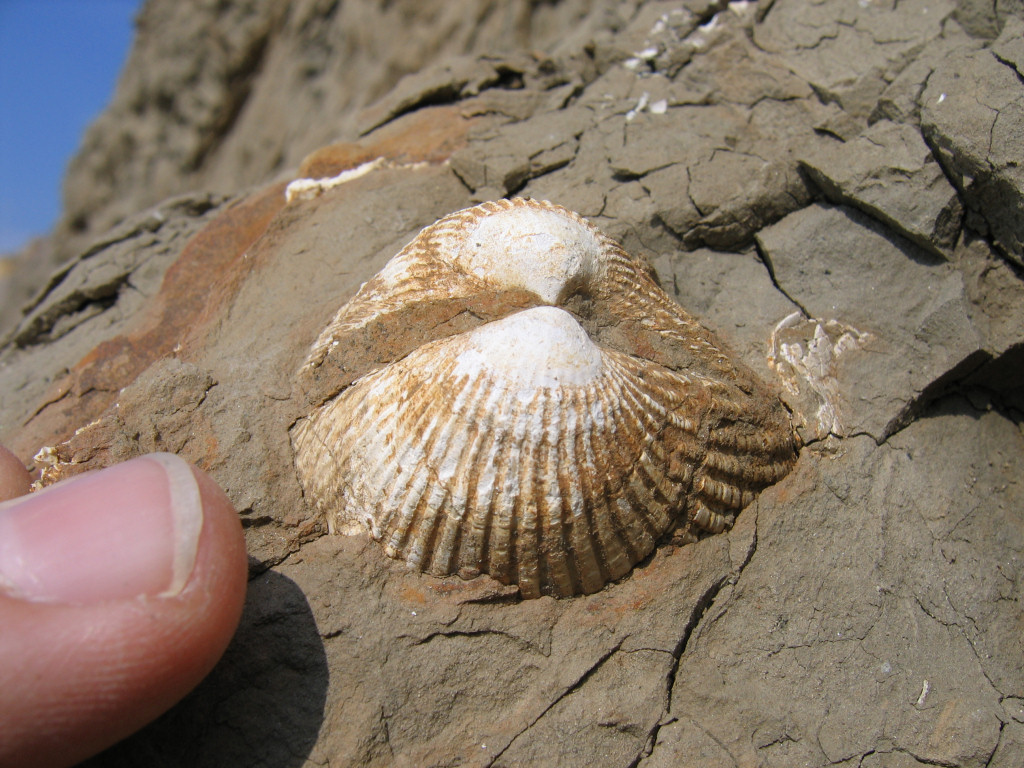
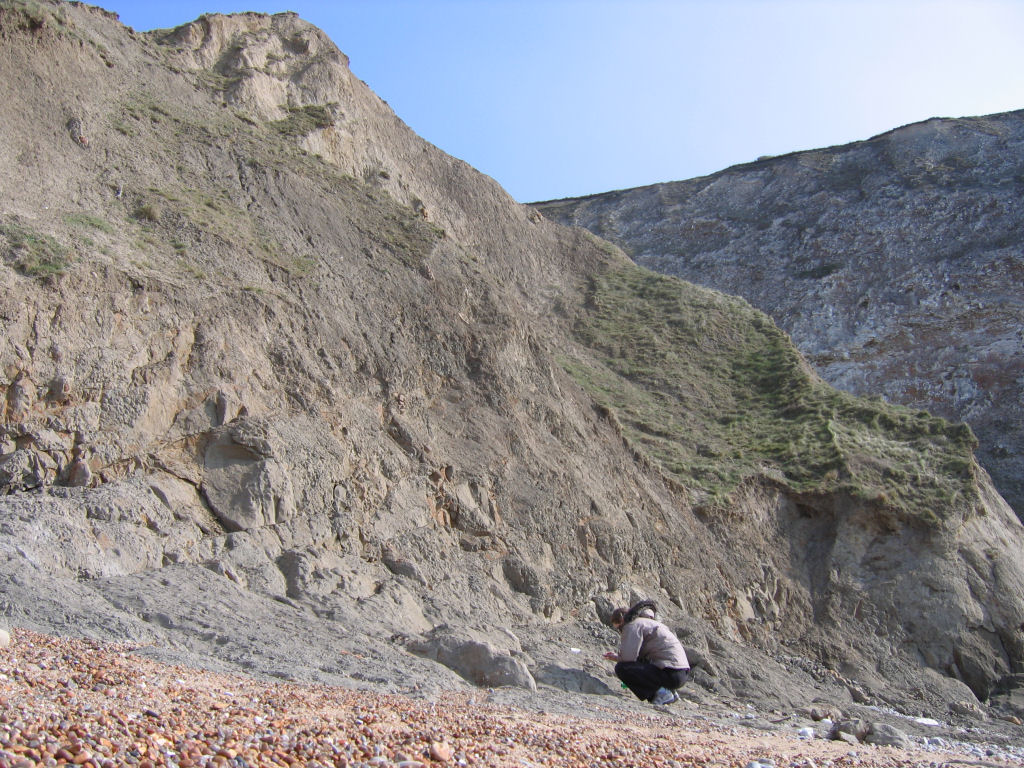
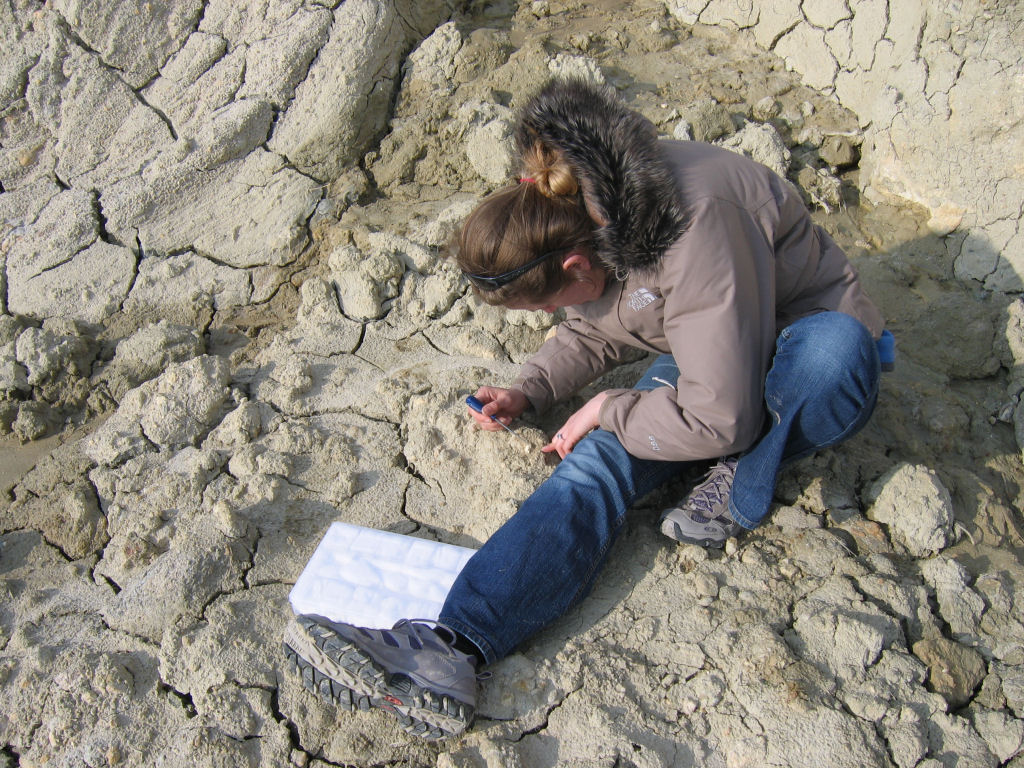
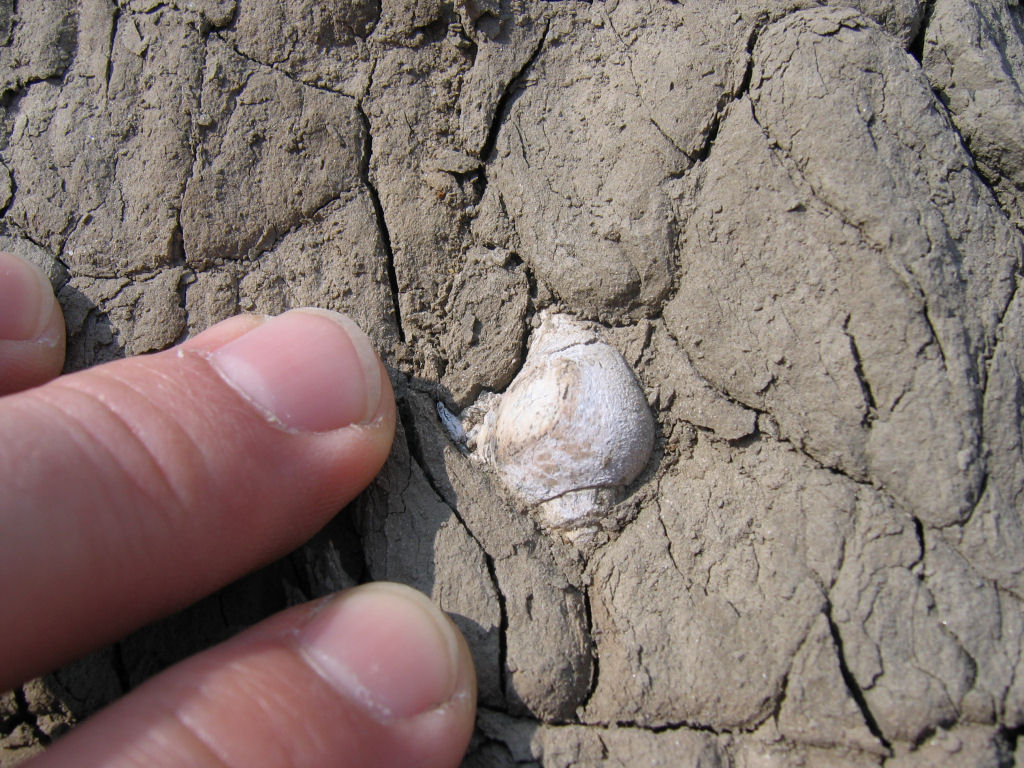
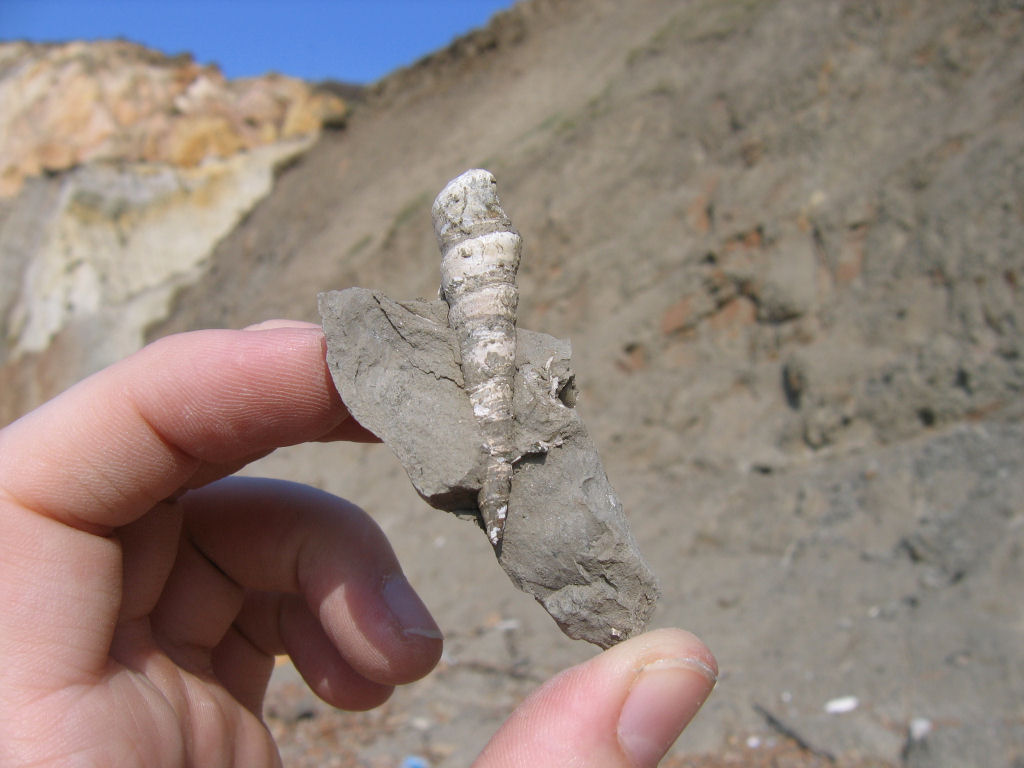
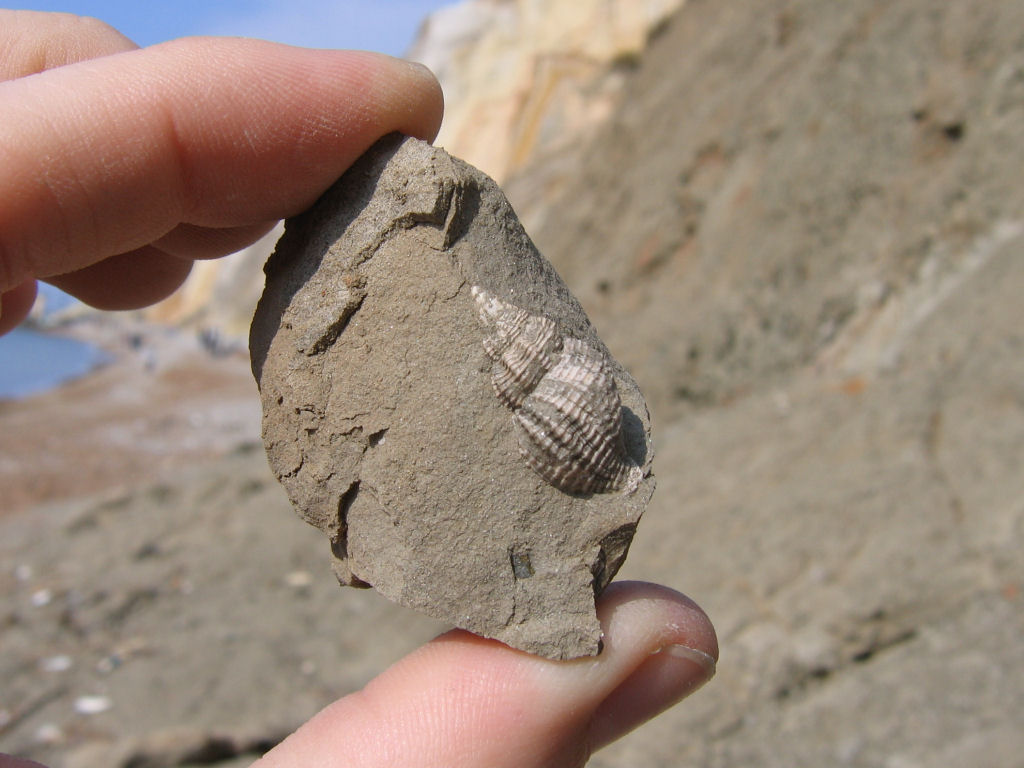
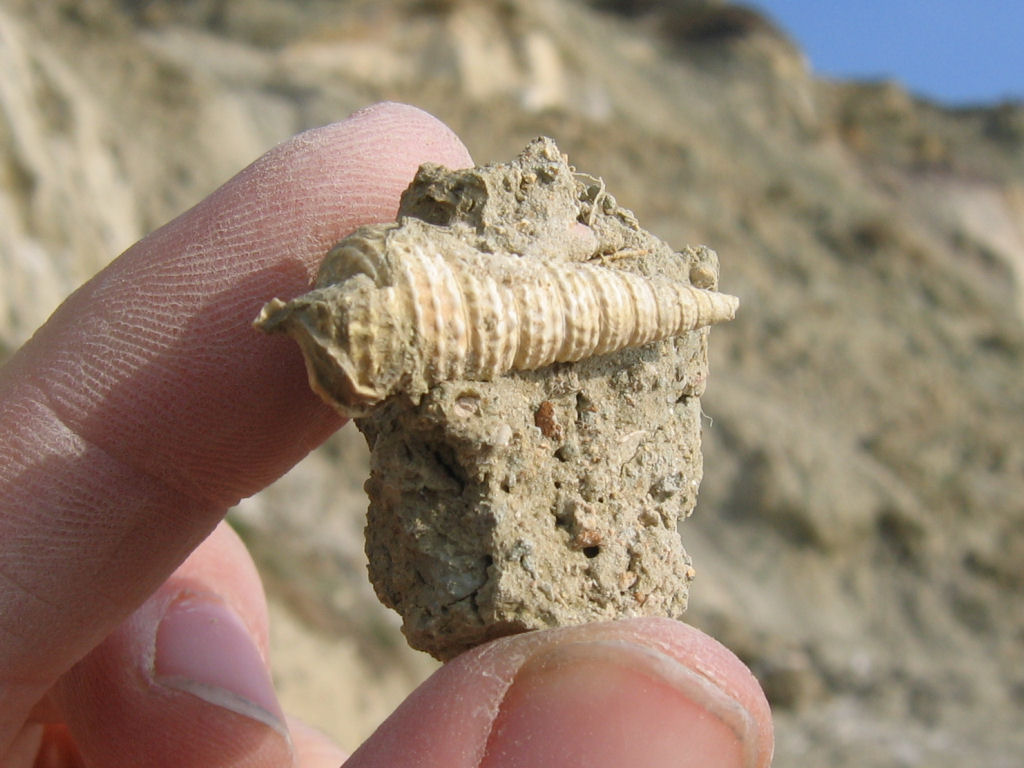
The best place to search for fossils is at the southern end of the bay, within the London Clay, just before the Reading Formation and chalk cliffs. At this point the clay is slumping onto the foreshore and many fossils can be found protruding its surface; it’s possible to simply pluck specimens (mainly bivalve and gastropod shells) from the clay (see photo below).
Fossils can also be found within the chalk exposed on the foreshore, although the volume and range of finds is limited by the concentration of fossil material and also the accessibility of these exposures. For individuals seeking a greater scientific appreciation of the geology, a close inspection of these exposures will reveal fragments of echinoids and bivalves. Unfortunately we have no photos of fossils from the chalk or flint to include at this time.

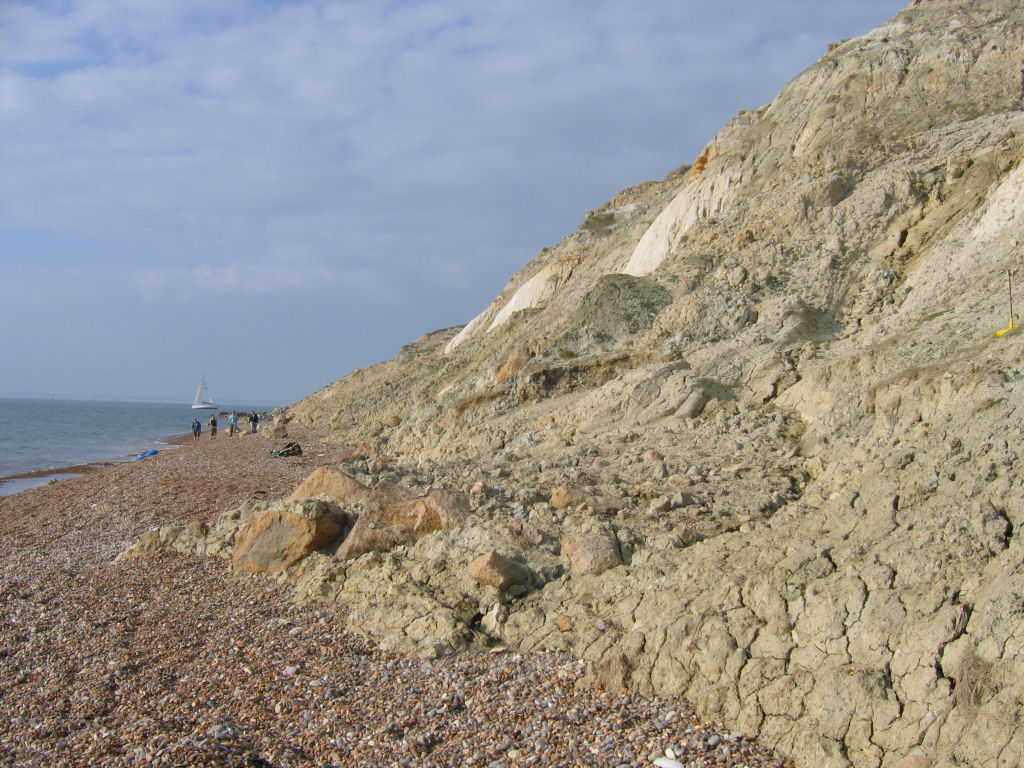
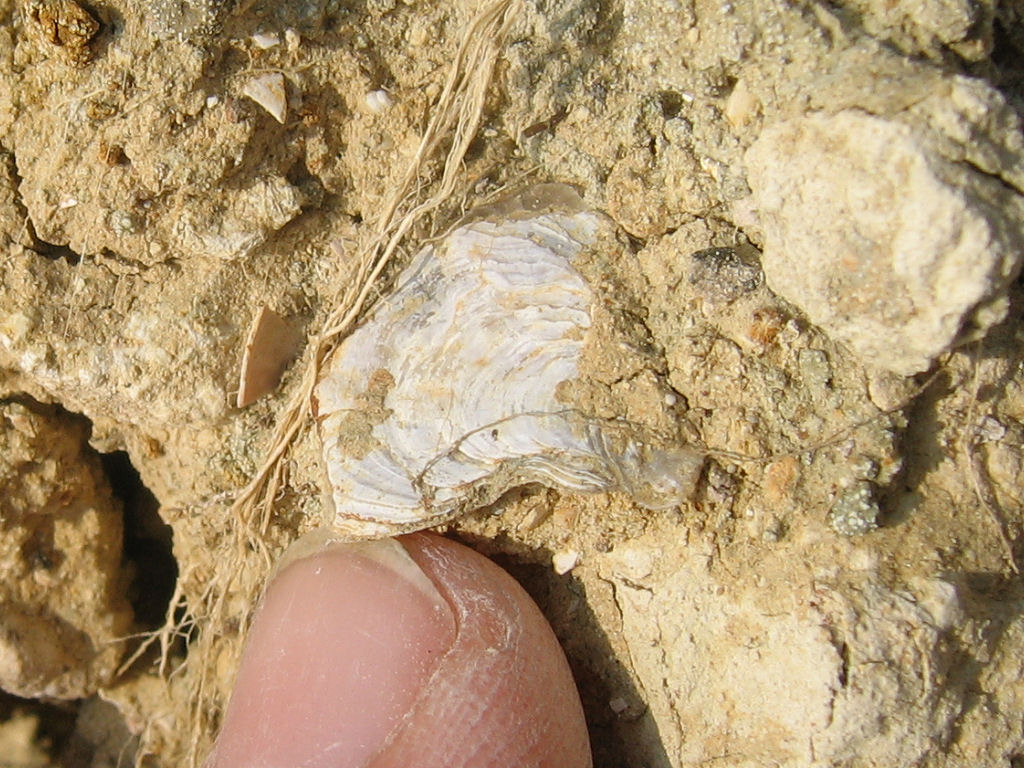
During your visit to Alum Bay it’s worth spending some time searching the Barton Group of sediments at the northern end of the bay. Shortly after you pass the chair-lift the Barton Clay slumps onto the foreshore (see photo below).
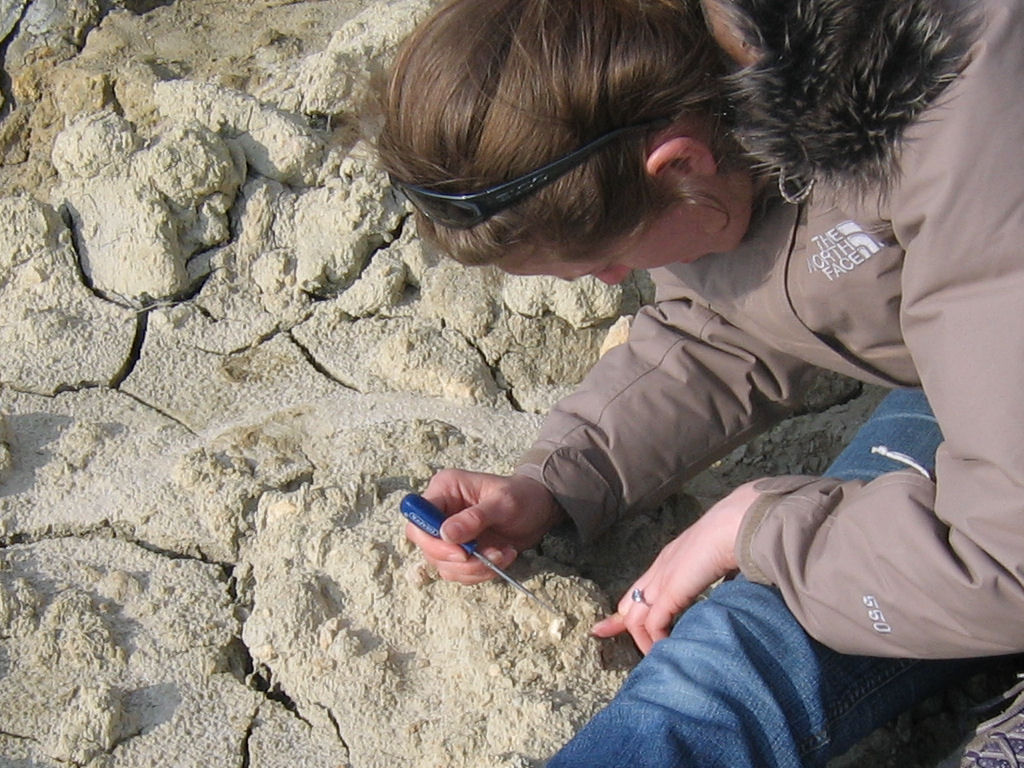
A small steel probe or similar tool will provide a useful implement for removing specimens from the foreshore clay, although many specimens are simply lying on the surface and can be collected with ease. For more information about the features and processes controlling coastal fossil collecting locations click here.
As with all coastal locations, a fossil hunting trip is best timed to coincide with a falling or low-tide. For a relatively low one-off cost we recommend the use of Neptune Tides software, which provides future tidal information around the UK click here. Alternatively a free short range forecast covering the next 7 days is available on the BBC website click here.
What fossils might you find?
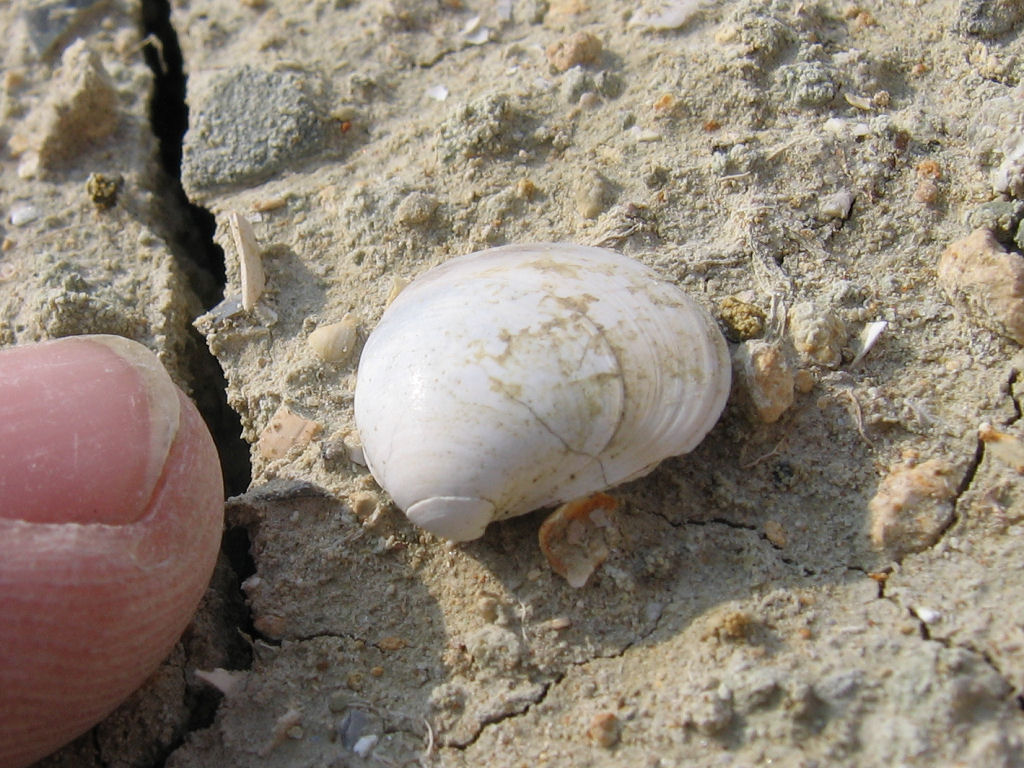
The most common fossils at Alum Bay are bivalve and gastropod shells, found within the London and Barton Clay on the foreshore. Worn echinoids and brachiopods can be found within the flint, but these are rarely of a collectable quality. The following photos show a selection of specimens gathered over the space of two hours.
Tools & equipment
It’s a good idea to spend some time considering the tools and equipment you’re likely to require while fossil hunting at Alum Bay. Preparation in advance will help ensure your visit is productive and safe. Below are some of the items you should consider carrying with you. You can purchase a selection of geological tools and equipment online from UKGE.
Steel point: In some instances it’s not necessary to use a hammer and chisel to remove the matrix surrounding the fossil. Sometimes all that’s required is some careful precision work using a steel point. This is particularly relevant with crumbly matrix, where chiselling may otherwise shatter a fragile fossil.
Hand lens: A hand lens enables the fossil hunter to enjoy the finer details of the specimens they find. It’s often remarkable how well preserved some of the most intricate structures can be. We recommend a lens with x10 magnification that folds away into a metal casing to protect it from damage.
Strong bag: When considering the type of bag to use it’s worth setting aside one that will only be used for fossil hunting, rocks are usually dusty or muddy and will make a mess of anything they come in contact with. The bag will also need to carry a range of accessories which need to be easily accessible. Among the features recommended include: brightly coloured, a strong holder construction, back support, strong straps, plenty of easily accessible pockets and a rain cover.
Walking boots: A good pair of walking boots will protect you from ankle sprains, provide more grip on slippery surfaces and keep you dry in wet conditions. During your fossil hunt you’re likely to encounter a variety of terrains so footwear needs to be designed for a range of conditions.
For more information and examples of tools and equipment recommended for fossil hunting click here or shop online at UKGE.
Protecting your finds

It’s important to spend some time considering the best way to protect your finds onsite, in transit, on display and in storage. Prior to your visit, consider the equipment and accessories you’re likely to need, as these will differ depending on the type of rock, terrain and prevailing weather conditions.
When you discover a fossil, examine the surrounding matrix (rock) and consider how best to remove the specimen without breaking it; patience and consideration are key. The aim of extraction is to remove the specimen with some of the matrix attached, as this will provide added protection during transit and future handling; sometimes breaks are unavoidable, but with care you should be able to extract most specimens intact. In the event of breakage, carefully gather all the pieces together, as in most cases repairs can be made at a later time.
For more information about collecting fossils please refer to the following online guides: Fossil Hunting and Conserving Prehistoric Evidence.
Join us on a fossil hunt
Discovering Fossils guided fossil hunts reveal evidence of life that existed millions of years ago. Whether it’s your first time fossil hunting or you’re looking to expand your subject knowledge, our fossil hunts provide an enjoyable and educational experience for all. To find out more click here.
Page references: Alister Cruickshanks of UKFossils for his useful table of geological time periods; Dr Ian West of www.soton.ac.uk, for general geological background and illustrations; British Regional Geology – The Hampshire Basin and adjoining areas, 4th edition, for scientific reference.