

Established 2002
Contact details

Follow us on:

Written and designed by Roy Shepherd. Special
thanks to my wonderful wife
Lucinda Shepherd, friend Robert Randell and various experts for their support.
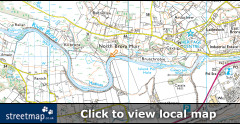
River Brora (Sutherland)
Lucinda Shepherd, friend Robert Randell and various experts for their support.
River Brora (Sutherland)
Location maps

Location summary
Geological period
Middle Jurassic epoch
Approximate age
162 million years
Fossil diversity
Ammonites, belemnites...
Supply of fresh material
Limited
Dangers to consider
Fast flowing, deep water...
read more
Equipment needed
Hammer, chisel, eye protection...
Protection status
This location is designated a
SSSI
Printer friendly PDF
Click above to view page as a PDF.
Click here to download PDF software.
How might the Brora area have looked 162 million years ago?

Introduction
The River Brora provides an isolated exposure of Middle Jurassic rock along its banks, approximately one mile inland from the river mouth. Accessibility is dependent on the prevailing weather conditions; during periods of sustained wet weather the water depth and flow makes viewing or collecting fossils difficult and potentially dangerous.
Please also note that this location has been designated a Site of Special Scientific Interest (SSSI), which means it's illegal to hammer or collect in situ fossils from the river-cliff (see details below); fossil collecting is permitted from the boulders at the river side, down stream of the exposures described. The nature of the terrain and exposures means the River Brora is best enjoyed by experienced collectors and/or the scientific community; it's less suitable for families or inexperienced collectors for much of the year.
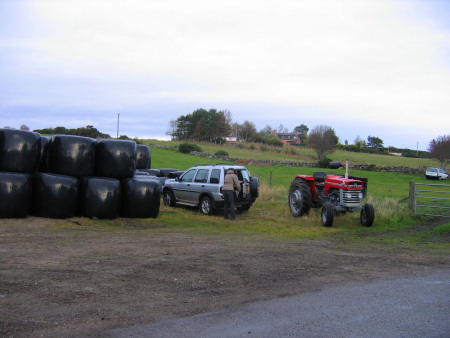

Left: Limited
roadside parking is available with permission from the farm.
Right: Access to the river is made along a narrow track
leading from the road.
Access to the river is made along a narrow road running along the north side of the river; a small track (see above-right) leads to the exposure river banks.
The geology of River Brora
The rocks exposed along the River Brora date from the later part of Middle Jurassic, specifically the Callovian stage 164.7 ± 4.0 to 161.2 ± 4.0 million years ago. The presence of ammonites and drift wood indicates the sediment was formed within a marine environment, close to the land.

ADVERTISEMENT BY UKGE - OFFICIAL ADVERTISING PARTNER OF DISCOVERING FOSSILS
Where to look for fossils?
The erosive forces of the River Brora have exposed a relatively small stretch of Jurassic rock, rich in fossils, along its northern flank, approximately one mile inland of the river mouth. The photos below show the river follow a period of relatively low precipitation, at which time the water level and flow are sufficiently low to examine the exposures.
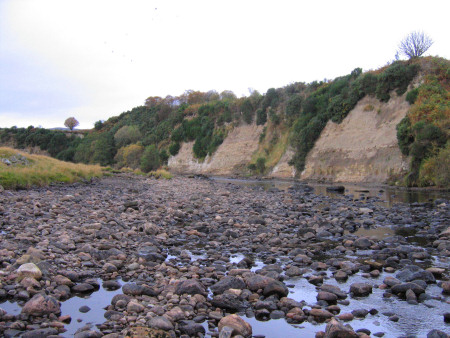
Left: The loose
boulders provide the best opportunity to collect fossils.
Right: The eroded river bank provides an opportunity to
examine (not collect) fossils.
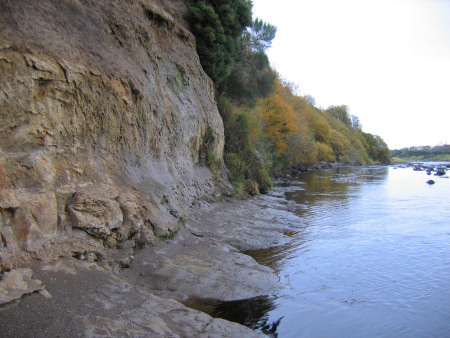
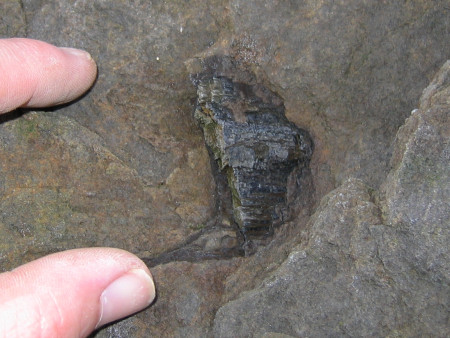
Due to its SSSI status fossil collecting is not permitted from the exposures themselves (see photos above); however visitors can still observe a number of belemnite guards protruding from the eroded surface. The best place to collect fossils is down stream of the exposures, from the boulders on the river bank and within the shallows (see photos below).
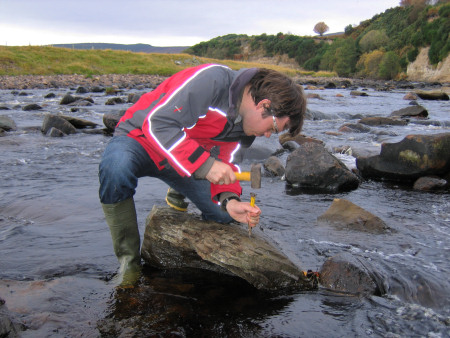

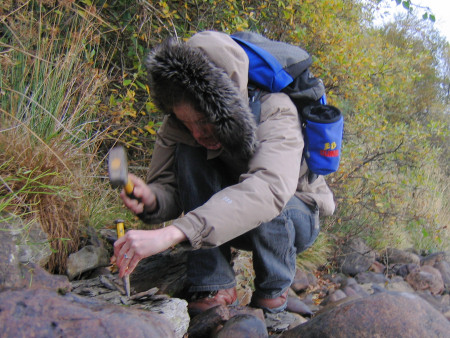
Left: Collecting
fossils from a river boulder, down-stream of the exposures.
Right: A hammer and chisel are needed to split loose rocks.
A hammer and chisel provide the best opportunity for extracting specimens, many of which are clearly visible on the boulder surfaces.
What fossils might you find?
The most common fossils (worth retrieving) are Belemnite guards and Ammonite shells, although the latter are often poorly preserved. The photos below provide a snapshot of the type of specimens encountered during a typical visit.
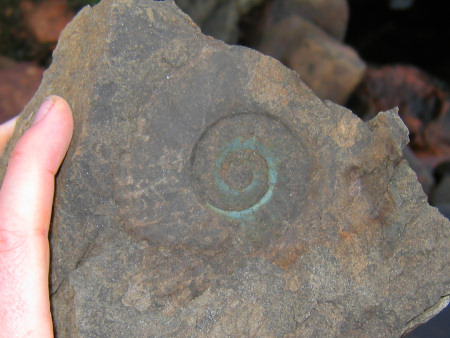

Left: Ammonite
(Binatisphinctes?) exhibiting a reflective blue tint.
Right: A squashed ammonite (Kosmoceras) on
the surface of a boulder.
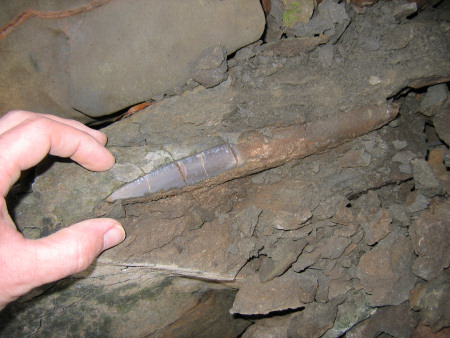
The ammonites at Brora are poorly preserved, often barely distinguishable from the surrounding matrix (above-left) or squashed (above-right). The Belemnites guards on the other hand are well preserved and can be collected with ease; specimens range from just a few centimetres to over 20cm as shown in the photo below-right.

Left: A second squashed
ammonite (Kosmoceras) on the surface of a boulder.
Right: A large and nearly intact belemnite within a
split boulder.
Other common fossils include pieces of wood (below-right), which provide evidence that these sediments were deposited in close proximity to the land; in most instances fossils provide enjoyment for the context they add, rather than their collectability!
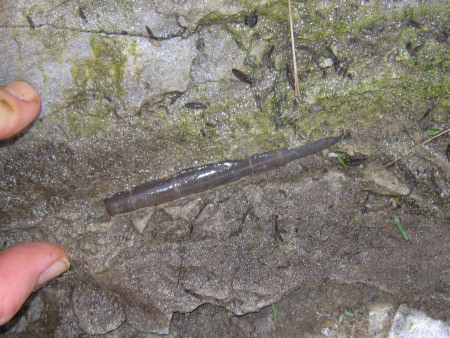
Left: A small, complete
belemnite on the surface of a river boulder. Right: A
fragment of wood.
Tools & equipment

Left: Wellies are
essential for accessing the fossil collecting areas along the river. Right:
A hammer and chisel are useful for splitting prospective rocks.
It's a good idea to spend some time considering the tools and equipment you're likely to require while fossil hunting at the River Brora. Preparation in advance will help ensure your visit is productive and safe. Below are some of the items you should consider carrying with you. You can purchase a selection of geological tools and equipment online from UKGE.
Hammer: A strong hammer will be required to split prospective rocks. The hammer should be as heavy as can be easily managed without causing strain to the user. For individuals with less physical strength and children (in particular) we recommend a head weight no more than 500g.
Chisel: A chisel is required in conjunction with a hammer for removing fossils from the rocks. In most instances a large chisel should be used for completing the bulk of the work, while a smaller, more precise chisel should be used for finer work. A chisel founded from cold steel is recommended as this metal is especially engineered for hard materials.
Safety glasses: While hammering rocks there's a risk of injury from rock splinters unless the necessary eye protection is worn. Safety glasses ensure any splinters are deflected away from the eyes. Eye protection should also be worn by spectators as splinters can travel several metres from their origin.
Strong bag: When considering the type of bag to use it's worth setting aside one that will only be used for fossil hunting, rocks are usually dusty or muddy and will make a mess of anything they come in contact with. The bag will also need to carry a range of accessories which need to be easily accessible. Among the features recommended include: brightly coloured, a strong holder construction, back support, strong straps, plenty of easily accessible pockets and a rain cover.
Wellies: A good pair of wellies are needed to access the best fossil collecting areas along the river banks and among the boulders.
For more information and examples of tools and equipment recommended for fossil hunting click here or shop online at UKGE.

ADVERTISEMENT BY UKGE - OFFICIAL ADVERTISING PARTNER OF DISCOVERING
FOSSILS
Protecting your finds
It's important to spend some time considering the best way to protect your finds onsite, in transit, on display and in storage. Prior to your visit, consider the equipment and accessories you're likely to need, as these will differ depending on the type of rock, terrain and prevailing weather conditions.
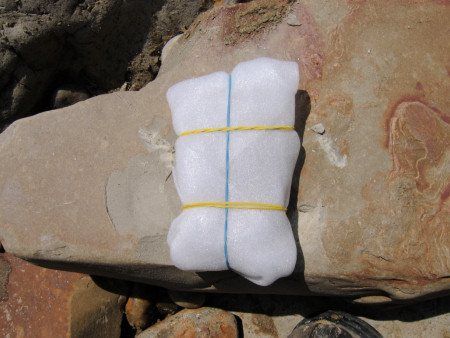
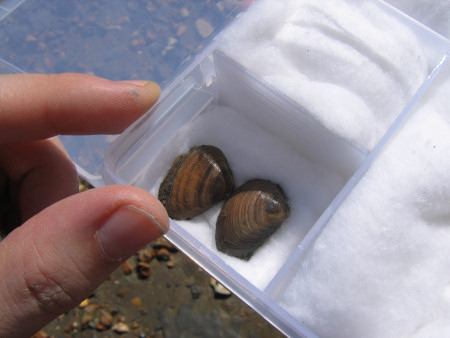
Left: Fossil
wrapped in foam, ready for transport. Right:
A small compartment box containing cotton wool is ideal for
separating delicate specimens.
When you discover a fossil, examine the surrounding matrix (rock) and consider how best to remove the specimen without breaking it; patience and consideration are key. The aim of extraction is to remove the specimen with some of the matrix attached, as this will provide added protection during transit and future handling; sometimes breaks are unavoidable, but with care you should be able to extract most specimens intact. In the event of breakage, carefully gather all the pieces together, as in most cases repairs can be made at a later time.
For more information about collecting fossils please refer to the following online guides: Fossil Hunting and Conserving Prehistoric Evidence.
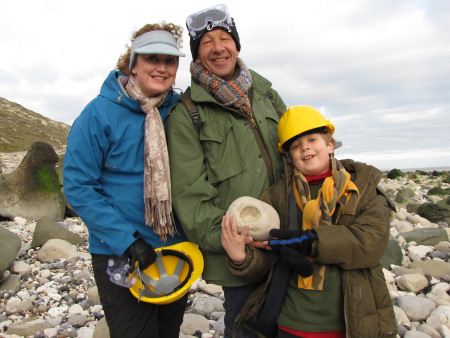
Join us on a fossil hunt
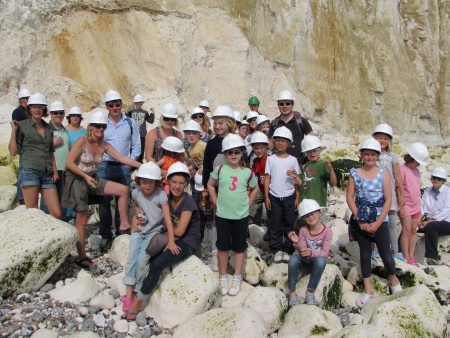
Left: A birthday party with
a twist - fossil hunting at
Peacehaven.
Right: A family hold their prized ammonite at Beachy Head.
Discovering Fossils guided fossil hunts reveal evidence of life that existed millions of years ago. Whether it's your first time fossil hunting or you're looking to expand your subject knowledge, our fossil hunts provide an enjoyable and educational experience for all. To find out more CLICK HERE


