

Established 2002
Contact details

Follow us on:

Written and designed by Roy Shepherd. Special
thanks to my wonderful wife
Lucinda Shepherd, friend Robert Randell and various experts for their support.
Marloes Sands (Pembrokeshire)
Lucinda Shepherd, friend Robert Randell and various experts for their support.
Marloes Sands (Pembrokeshire)
Location maps
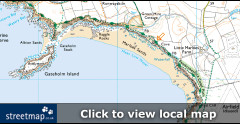
Location summary
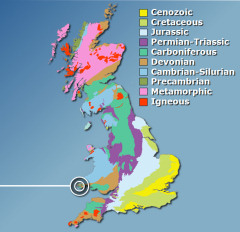
Geological period
Silurian
Approximate age
439-423 million years
Fossil diversity
Trilobites, corals, brachiopods...
Supply of fresh material
Limited
Dangers to consider
Falling rocks, rising tide...
read more
Equipment needed
Hammer, chisel, eye protection...
Protection status
This location is designated a
SSSI
Printer friendly PDF
Click above to view page as a PDF.
Click here to download PDF software.
How might the Marloes Sands area have looked 430 million years ago?
Introduction
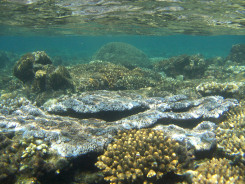
Marloes Sands is a geologically wondrous location, encompassing towering cliffs, a beautiful expanse of sand and clean sea water throughout the year. Although finding fossils can prove more difficult than at other locations, the geological features alone will impress most visitors. Unless you're actively studying the subject, or an experienced palaeontologist, this locality is not recommended for collecting fossils.
The surrounding area is managed by the National Trust, who provide information about the geology and wildlife from a small office within the cliff-top car park; the staff are always happy to direct visitors to the beach. A small parking charge is payable at the National Trust office upon arrival.
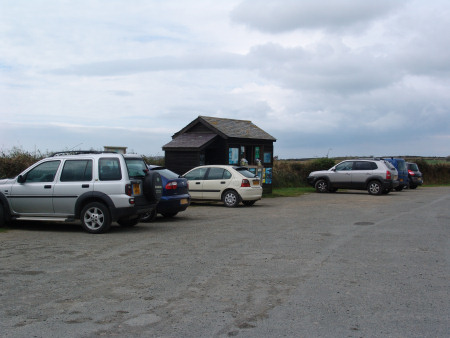
Left: National
Trust car park and information office. Right:
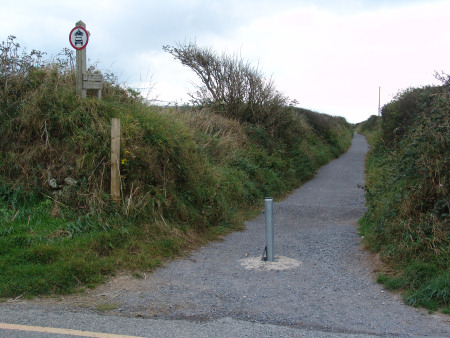
Public footpath leading to the beach - 700m.
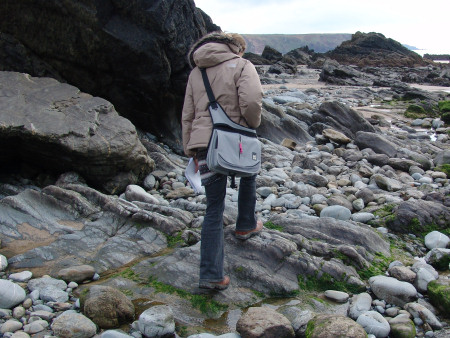
Access to the beach is made along a gravel surfaced footpath, located 100m back along the road, north of the car park. The walk takes about 10 minutes and leads to the foreshore. Once you reach the beach a small wooden bridge crosses a small stream, beyond which a short walk leads to the vantage point that the following two photos were taken from.
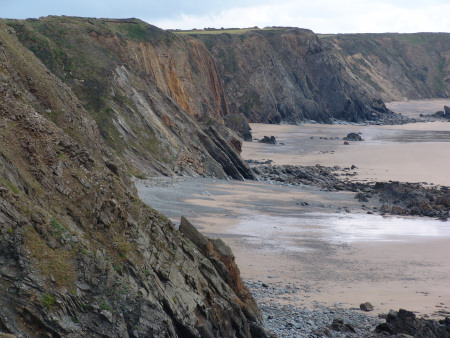
Left: View over the
southern end of the bay. Right: View over the
northern end of the bay.
The geology of Marloes Sands
Marloes Sands comprises four main geological groups - Skomer Volcanic, Coralliferous, Gray Sandstone and Old Red Sandstone (fig.1 below). From the beach access point, heading south (left when facing out to sea), visitors will pass through each group in turn, until you reach the end of the bay (Old Red Sandstone).
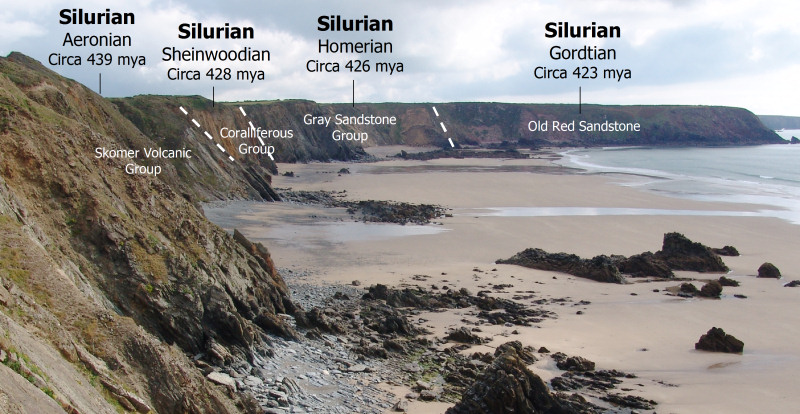
Figure 1: Detailed
stratigraphy of Marloes Sands - adapted from Walmsley and Bassett,
1976.
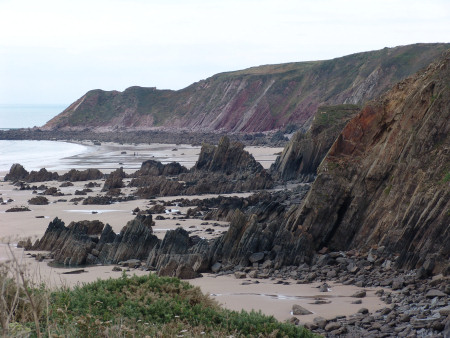
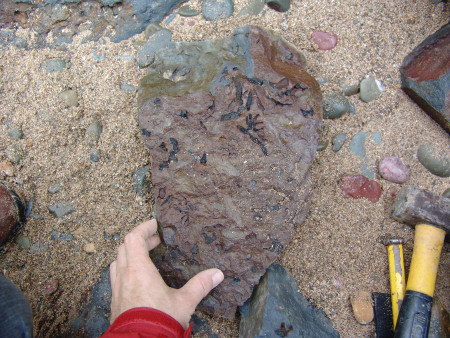
Fossils are less common in all but the Coralliferous Group (see stratigraphy above), which reveals a wealth of marine organisms from the Silurian period (circa 428 million years ago). The photo below Left: shows and accumulation of loose rocks from the Coralliferous Group, from which the specimens featured on this page were largely found.
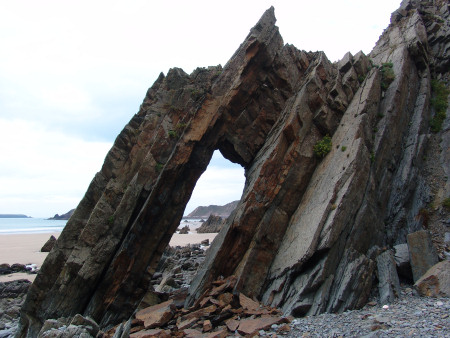
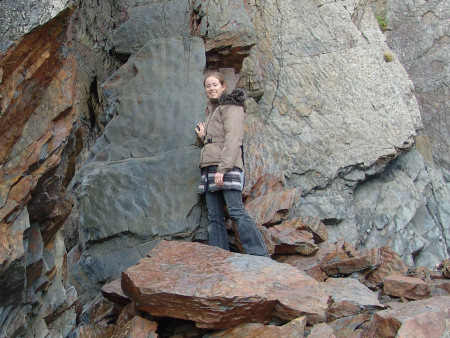
Left: Vertical
strata belonging to the Coralliferous Group. Right:
Skomer Volcanic Group rocks containing lagoonal ripple marks.
Visitors can also find evidence of ripples within the older Skomer Volcanic Group, which are thought to have been formed in a shallow lagoon, 439 million years ago; the photos below show some of the large symmetrical examples found at the cliff base.
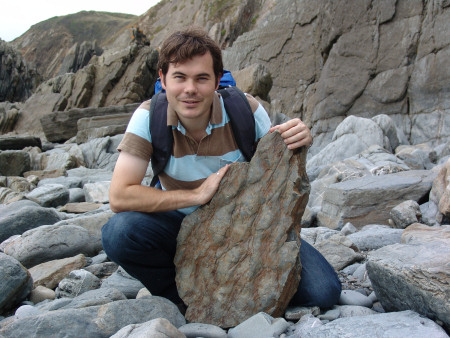
Left: Roy props up
a large section of rock featuring prehistoric ripple marks. Right:
Some of the ripple marks are evident of large slabs.
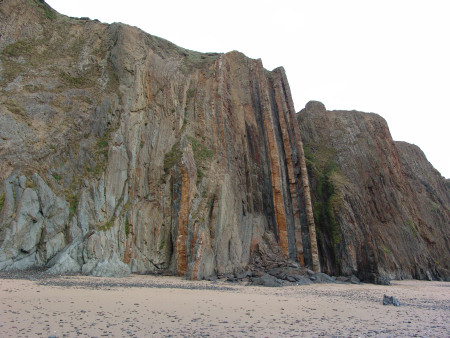
At the southern end of the bay you reach the 'Old Red Sandstone' which was formed from sediments weathered out of a mountain chain, extending from what is now Scandinavia through Scotland to the Catskill Mountains of America. Although fossils weren't discovered here during our recent visit the Old Red Sandstone holds the evidence of an extraordinary period of the planet's history, when the vertebrates developed, flourished in the seas and rivers, and emerged on to the land, where the first vascular plants took root and the first arthropods crawled, breathed air and took wing.


ADVERTISEMENT BY UKGE - OFFICIAL ADVERTISING PARTNER OF DISCOVERING FOSSILS
Where to look for fossils?
Fossils are not abundant at Marloes Sands and visitors will need to search hard to find productive spots. The best places to search are the scree accumulations at the base of the cliff, although these themselves are limited to just a small number. In September 2007 there were two relatively productive areas, both situated towards the southern end of the bay; however, despite the illusion of rapid erosion this particular cliff collapse originally occurred over twenty years earlier.
As with all coastal locations, a fossil hunting trip is best timed to coincide with a falling or low-tide. For a relatively low one-off cost we recommend the use of Neptune Tides software, which provides future tidal information around the UK. To download a free trial click here. Alternatively a free short range forecast covering the next 7 days is available on the BBC website click here.
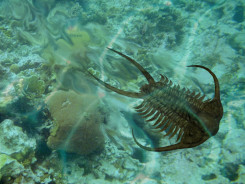
What fossils might you find?
Once a productive spot is found it's possible to collect a range of marine based fossils, in particular Trilobites and Cephalopods, although these are among the less common specimens. The most common fossils are corals, brachiopods and bivalves, many of which have been crushed through time.
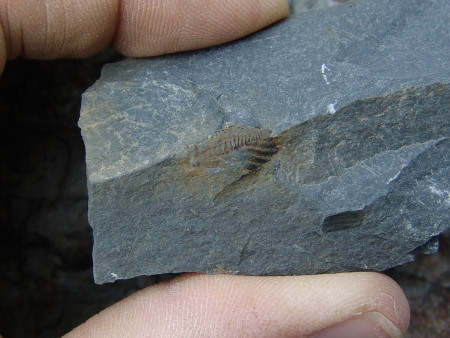
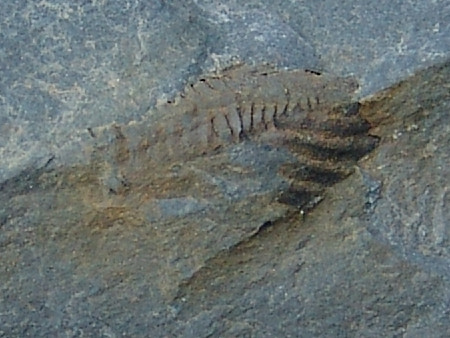
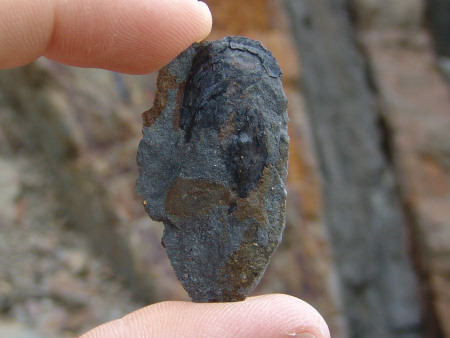
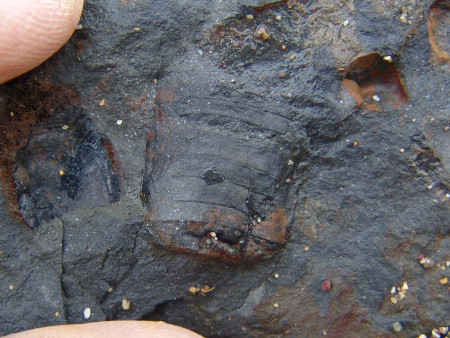
Left: A small
trilobite tail. Right: A close-up on the
trilobite.
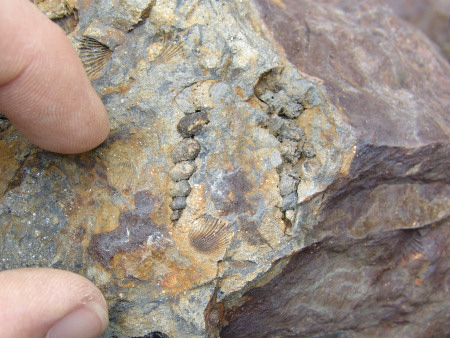
Left: Two Loxonema gastropods in amongst a number of brachiopod
impressions. Right: Isolated fragment of
favosites(?) coral.
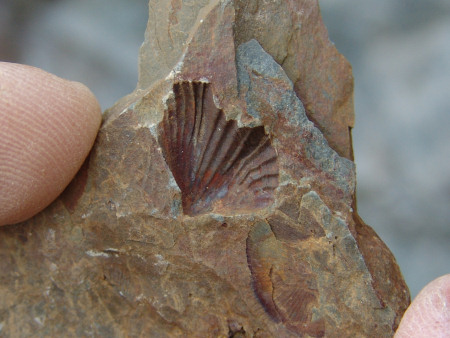
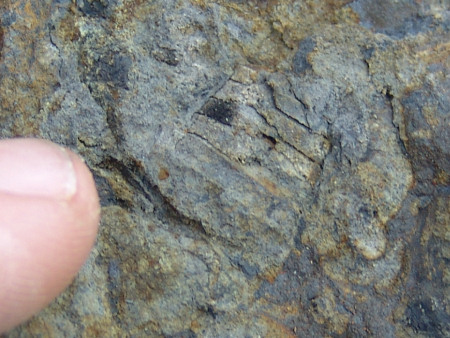
Left: An impression
of a Rhynchonellid brachiopod shell. Right:
A Lingula brachiopod.
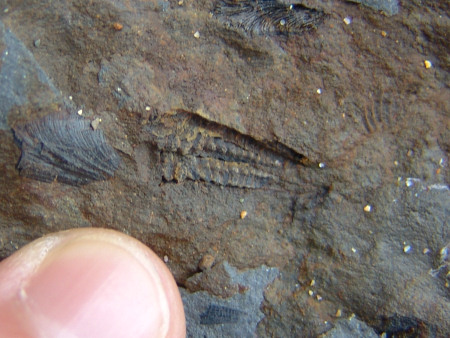
Left: A small
section of a cephalopod clearly showing the horizontal segmentation
of the body. Right: A second cephalopod.
Left: A small inner
side of a Leptostrophia brachiopod shell Right:
A small coral.
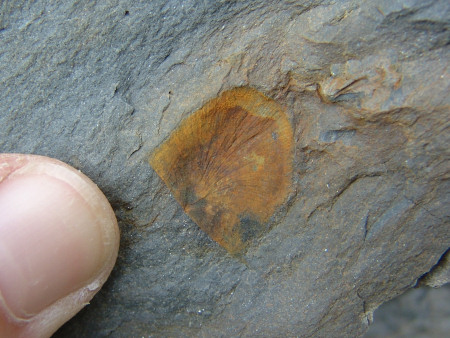
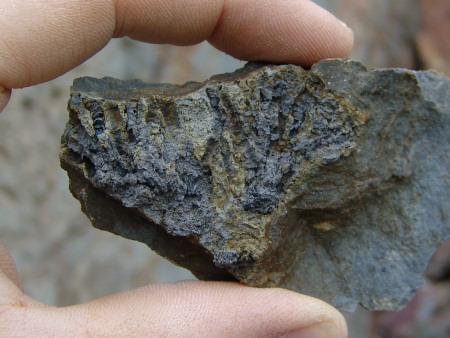
Corals are also common within selected horizons, some of which feature delicate feather-like structures, as shown below. The presence of corals within this relatively brief window of time, reveals a period of shallow marine conditions, as the corals themselves required plenty of sunlight to survive.
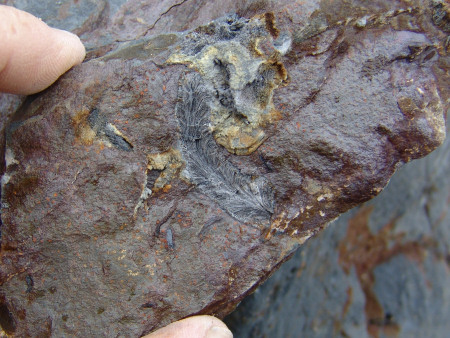
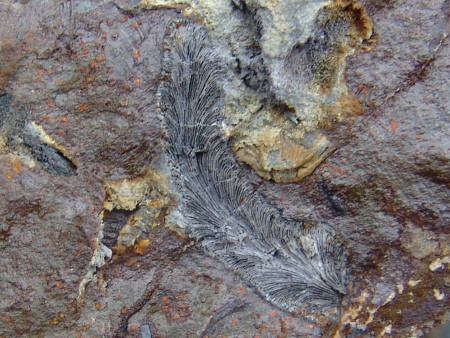
Left: A narrow,
feather-like coral. Right: A close-up of the
coral.
Other interesting finds include isolated pebbles within the shales, known commonly as erratics; the photos below show two examples. Note, the example of the left shelters two small brachiopods along its lower edge, these were either washed into position after death, or more likely attached themselves to the pebble prior to burial. Erratics with smoothed edges (as shown) indicate they've been exposed to extensive rolling within a river/stream or on a beach foreshore, prior to deposition - this evidence reveals these shallow waters were also close to land.
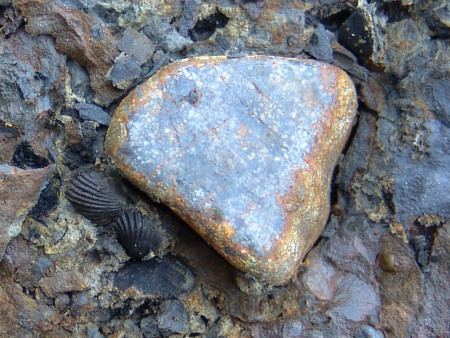

Left: An isolated
beach pebble and who brachiopods. Right: A second
beach pebble containing multiple cracks caused by exposure to
pressure through time.
Tools & equipment
Left: A strong bag
and walking boots are recommended. Right:
A hammer & chisel are useful for splitting prospective rocks.
It's a good idea to spend some time considering the tools and equipment you're likely to require while fossil hunting at Marloes Sands. Preparation in advance will help ensure your visit is productive and safe. Below are some of the items you should consider carrying with you. You can purchase a selection of geological tools and equipment online from UKGE.
Hammer: A strong hammer will be required to split prospective rocks. The hammer should be as heavy as can be easily managed without causing strain to the user. For individuals with less physical strength and children (in particular) we recommend a head weight no more than 500g.
Chisel: A chisel is required in conjunction with a hammer for removing fossils from the rocks. In most instances a large chisel should be used for completing the bulk of the work, while a smaller, more precise chisel should be used for finer work. A chisel founded from cold steel is recommended as this metal is especially engineered for hard materials.
Safety glasses: While hammering rocks there's a risk of injury from rock splinters unless the necessary eye protection is worn. Safety glasses ensure any splinters are deflected away from the eyes. Eye protection should also be worn by spectators as splinters can travel several metres from their origin.
Strong bag: When considering the type of bag to use it's worth setting aside one that will only be used for fossil hunting, rocks are usually dusty or muddy and will make a mess of anything they come in contact with. The bag will also need to carry a range of accessories which need to be easily accessible. Among the features recommended include: brightly coloured, a strong holder construction, back support, strong straps, plenty of easily accessible pockets and a rain cover.
Walking boots: A good pair of walking boots will protect you from ankle sprains, provide more grip on slippery surfaces and keep you dry in wet conditions. During your fossil hunt you're likely to encounter a variety of terrains so footwear needs to be designed for a range of conditions.
For more information and examples of tools and equipment recommended for fossil hunting click here or shop online at UKGE.


ADVERTISEMENT BY UKGE - OFFICIAL ADVERTISING PARTNER OF DISCOVERING
FOSSILS
Protecting your finds
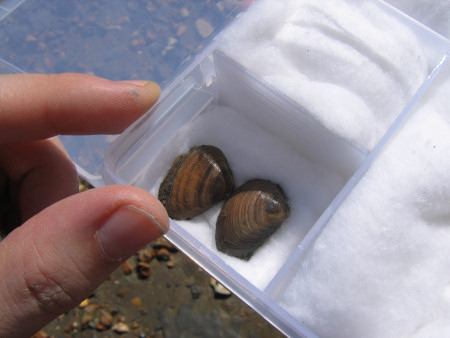
It's important to spend some time considering the best way to protect your finds onsite, in transit, on display and in storage. Prior to your visit, consider the equipment and accessories you're likely to need, as these will differ depending on the type of rock, terrain and prevailing weather conditions.
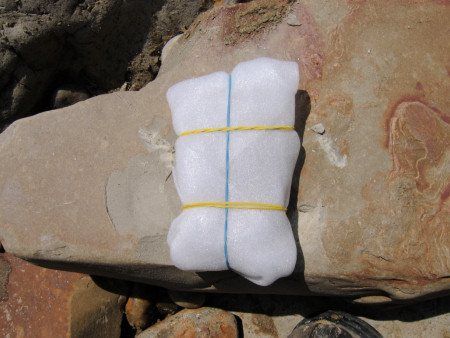
Left: Fossil
wrapped in foam, ready for transport. Right:
A small compartment box containing cotton wool is ideal for
separating delicate specimens.
When you discover a fossil, examine the surrounding matrix (rock) and consider how best to remove the specimen without breaking it; patience and consideration are key. The aim of extraction is to remove the specimen with some of the matrix attached, as this will provide added protection during transit and future handling; sometimes breaks are unavoidable, but with care you should be able to extract most specimens intact. In the event of breakage, carefully gather all the pieces together, as in most cases repairs can be made at a later time.
For more information about collecting fossils please refer to the following online guides: Fossil Hunting and Conserving Prehistoric Evidence.
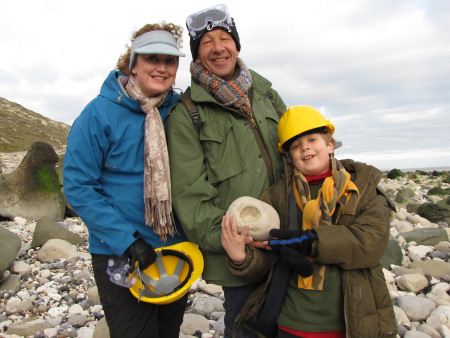
Join us on a fossil hunt
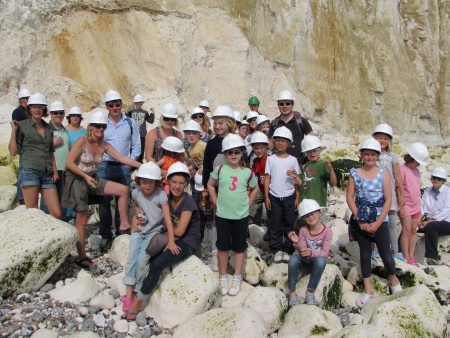
Left: A birthday party with
a twist - fossil hunting at
Peacehaven.
Right: A family hold their prized ammonite at Beachy Head.
Discovering Fossils guided fossil hunts reveal evidence of life that existed millions of years ago. Whether it's your first time fossil hunting or you're looking to expand your subject knowledge, our fossil hunts provide an enjoyable and educational experience for all. To find out more CLICK HERE


